- Key Takeaway
- You can turn any AI-generated image into a professional print-ready sticker in under ten minutes using a three-step workflow: generate the art with an AI image tool (ChatGPT, Grok, or similar), remove the background with a desktop background remover, and add a white sticker border for a clean cut path. The result is a transparent PNG ready to import directly into Cricut Design Space for print-then-cut.
How to Turn an Image Into a Sticker (AI Art → Cut-Ready PNG)
Making your own stickers used to mean either drawing everything by hand, paying a designer, or wrestling with Photoshop layer masks and clipping paths. None of that is necessary anymore. Modern AI image generators can produce sticker-quality artwork from a text description in seconds, and a decent background remover handles the cutout and border work that used to take the most time.
This guide covers the exact workflow I use to go from a text prompt to a physical printed sticker, including the specific settings and decisions that affect print quality. The whole process takes about five to ten minutes per sticker once you have done it a couple of times.
The workflow breaks down into six steps: generate the art with AI, remove the background, add a white sticker border, export as a transparent PNG, import into Cricut Design Space, and print then cut. Each step is straightforward on its own — the value is in knowing the right settings and avoiding the mistakes that waste paper and ink.
End result: A professional-looking sticker file with transparent background and white outline, ready for printing and cutting on a Cricut or similar machine.
Examples of finished stickers
These were all made using the workflow described below — AI-generated art, background removed with TomsBGRemover, white border added in Sticker Mode, exported as transparent PNG, and cut on a Cricut.

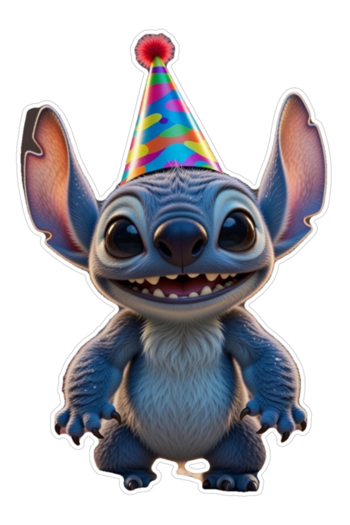
Example stickers: AI-generated character with background removed and white border.

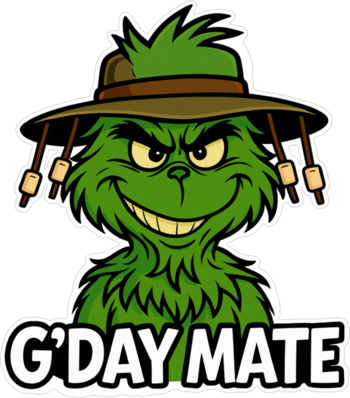
Example sticker: Bold colors and thick outline for easy cutting.
What you need
The toolchain is simple and most of it is free. You need an AI image generator — ChatGPT's DALL-E integration and Grok both work well for sticker-style art. You need a background removal tool that can output transparent PNGs with a clean border. You need sticker paper (glossy or matte, depending on the finish you want). And you need a cutting machine like a Cricut to handle the precision cutting around the sticker outline.
I use my own lightweight Windows desktop app for background removal and sticker borders:
- App page: https://tomdahne.com/TomsBGRemover/
The app handles the background removal, sticker border, and PNG export in a single tool with no uploads, no subscriptions, and no internet connection required. You can use any background remover you prefer — the workflow is the same regardless of the tool.
Step 1 – Generate an image with AI
The quality of your finished sticker depends heavily on how you prompt the AI. Stickers work best with bold shapes, high contrast, and clean outlines. Detailed photorealistic images with complex backgrounds produce poor stickers because the background removal has more work to do and the fine details get lost at small print sizes.
Prompts that work well for sticker art tend to include explicit style cues. Phrases like "sticker style", "bold outline", "cartoon style", "flat design", and "simple background" all push the AI toward output that translates well to a cut sticker. Asking for a white or solid-colour background makes the subsequent background removal cleaner and faster.
Some prompt examples that produce good sticker-ready output:
- Cute cartoon raccoon holding coffee, sticker style, bold outline, white background
- Green monster wearing sunglasses, flat design, thick black outline
- Cyberpunk skull, high contrast, simple background, sticker art
Square images tend to work best for stickers because they centre well on a sticker sheet and give the cutting machine consistent margins on all sides. Most AI generators default to square output, but if yours offers aspect ratio options, stick with 1:1 unless you specifically want a tall or wide sticker.
Download the generated image as PNG if the option is available. JPG works too but PNG preserves more detail, which matters when you are printing at sticker sizes where every pixel counts.
Step 2 – Remove the background
Open the image in TomsBGRemover and click Remove Background. The AI model analyses the image, identifies the foreground subject, and removes everything else, leaving you with a transparent PNG of just the character or design.
This step is what makes the sticker cuttable. A cutting machine like a Cricut uses the transparency boundary to determine where to cut. Without a clean background removal, the machine either cuts a rectangle around the entire image or follows a messy, jagged edge that ruins the sticker.
For most AI-generated sticker art — especially if you prompted for a simple background — the removal is clean on the first pass. If you see small background artifacts around the edges, running the removal a second time on the already-processed image usually cleans them up.
Why this matters: Transparent backgrounds tell cutting machines where the edge of the sticker is. Without clean transparency, the Cricut cannot distinguish your design from the surrounding space.
Step 3 – Add a white sticker border
A raw cutout with no border looks unfinished as a sticker and is harder for a cutting machine to cut cleanly. Adding a white border around the design creates a professional sticker appearance and gives the blade a smooth, consistent cut path with some margin for error.
Enable Sticker Mode inside TomsBGRemover. Select white as the border colour and choose a border thickness — somewhere between 5 and 20 pixels works for most sticker sizes. Thicker borders are more forgiving during cutting and give the sticker a bolder, more professional look. Thinner borders save space on the sticker sheet but leave less room for the blade to follow.
The border is generated algorithmically around the detected edge of the subject, so it follows the contour of the design rather than just adding a rectangle. This is what gives you the classic die-cut sticker shape.
Step 4 – Export as transparent PNG
Export the result as PNG with transparency enabled. This file is your finished sticker — the design with its white border on a transparent background, ready to import into your cutting software. Keep the original resolution from the AI generator intact. Resizing down at this stage loses detail that you cannot get back, and stickers are small enough that every pixel matters for print clarity.
If you are making multiple stickers in a batch, save each one to the same folder with a clear naming convention. TomsBGRemover supports bulk processing, so you can drop an entire folder of AI-generated images in and process them all at once — useful if you are producing a sticker sheet with multiple designs.
Step 5 – Import into Cricut Design Space
Open Cricut Design Space, click Upload, and select your PNG file. When the upload wizard asks about image complexity, select Complex — this tells the software to preserve all the detail in your design rather than simplifying it. On the next screen, confirm that the transparent areas are being detected correctly — you should see a checkerboard pattern where the background was removed. Insert the image into your canvas.
At this point you can resize the sticker to your target dimensions. Most stickers are between 2 and 4 inches on the longest side. Cricut Design Space shows the print size on screen, so you can judge whether the resolution is sufficient before committing to a print. If the image looks pixelated at your target size, go back to Step 1 and regenerate at a higher resolution.
Step 6 – Print then cut
Select Print Then Cut in Cricut Design Space. The software will send the sticker design to your printer first, then guide you to load the printed sheet into the Cricut for precision cutting around the border outline. Load your sticker paper into the printer with the printable side facing the correct direction for your printer model — glossy sticker paper is particularly unforgiving if loaded wrong.
After printing, place the sheet on the Cricut cutting mat and let the machine do the rest. The blade follows the contour of your white border, cutting out the sticker shape cleanly. Peel the finished sticker off the backing sheet and you have a physical sticker made from a text prompt.
Common mistakes and how to fix them
A few issues come up regularly when people are starting out with this workflow. Rough or jagged edges on the finished sticker usually mean the border thickness was too thin — increase it to 15–20 pixels and the cut path becomes smoother. Background artifacts around the edges of the design mean the background removal missed some pixels — run the removal again on the processed image, or try prompting the AI for a cleaner, more uniform background. Blurry prints are almost always caused by low-resolution source images — AI generators vary in output resolution, so check the pixel dimensions before proceeding. Anything under 1024×1024 will look soft at typical sticker sizes. Fine details getting lost during cutting means the design is too complex for the sticker format — ask the AI for simpler shapes with thicker lines.
Why I use a desktop background remover
Cloud-based background removers work, but they require uploading every image to someone else's server, which adds time and raises privacy questions if you are producing stickers for commercial sale or client work. They also tend to charge per image or require a subscription for batch processing.
A desktop tool runs entirely on your machine. No uploads, no waiting for server processing, no rate limits, no subscription costs. For sticker making specifically, the speed advantage is meaningful — you can generate, remove, border, and export a sticker in under a minute without switching between a browser and a desktop app. That is why I built TomsBGRemover as an offline tool in the first place.
Summary
The workflow is straightforward once you have done it a couple of times. AI generates the artwork from a text description. A background remover isolates the subject and creates a clean transparent cutout. Sticker Mode adds the white border that defines the cut path. The exported PNG imports directly into Cricut Design Space for print-then-cut. The entire process from prompt to physical sticker takes five to ten minutes, costs nothing beyond the sticker paper and ink, and produces results that look genuinely professional.
If you are making stickers for a market, a side hustle, or just for fun, this is the fastest and cheapest pipeline available right now. The tools are either free or one-time purchases, the AI art is unlimited, and the only consumable cost is the paper itself.